On this page
Getting Started
Welcome to Reliant! This guide will help you set up and start using your AI-powered coding assistant in just a few minutes.
Essential Setup
Step 1: Configure Your API Key
Before you can use AI features, you need an API key:
Option A: Use Your Claude Code Subscription
If you have an existing Claude Code subscription, you can use it with Reliant:
- Open your terminal
- Run:
claude setup-token - Copy the API key that’s displayed
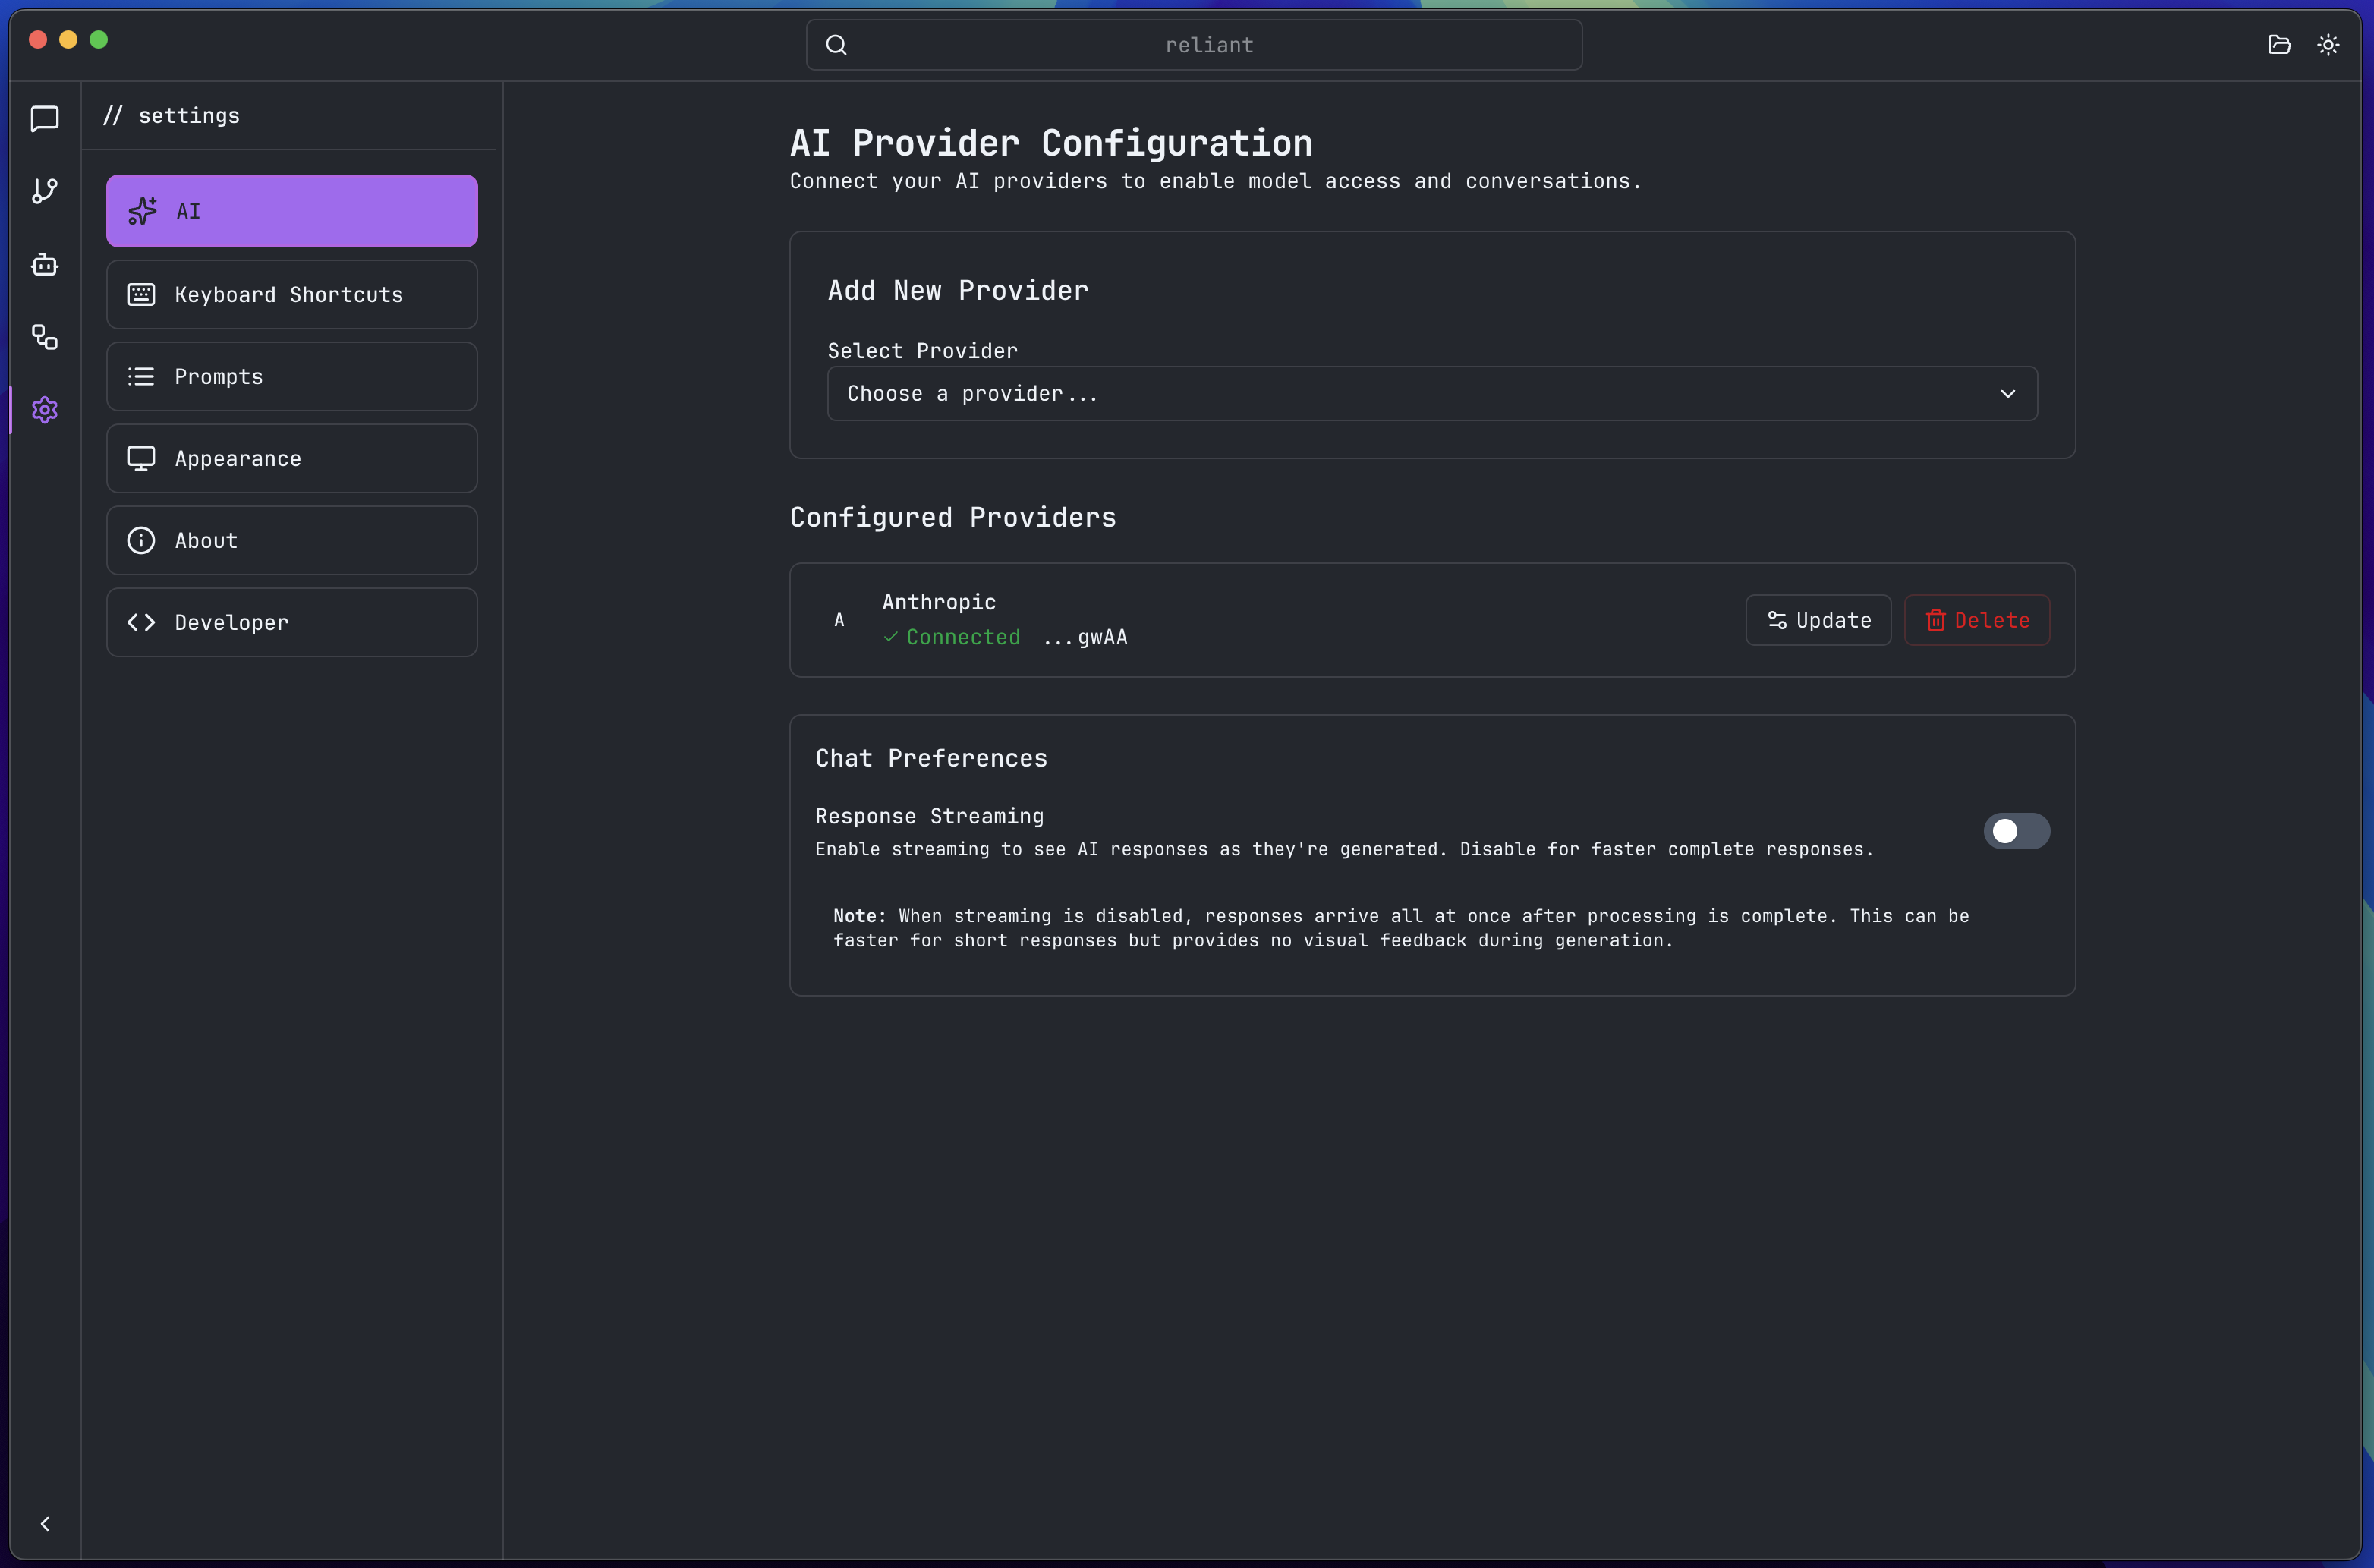
- In Reliant, click Settings in the sidebar (or press
Cmd+,) - Go to AI
- Select Anthropic as your provider
- Paste your API key
- Click “Test Connection”
- Click "+ Add Provider" when successful
Option B: Use Another Provider
- Click Settings in the sidebar (or press
Cmd+,) - Go to AI
- Select your provider
- Enter your API key
- Click “Test Connection”
- Click "+ Add Provider" when successful
Step 2: Open or Create a Project
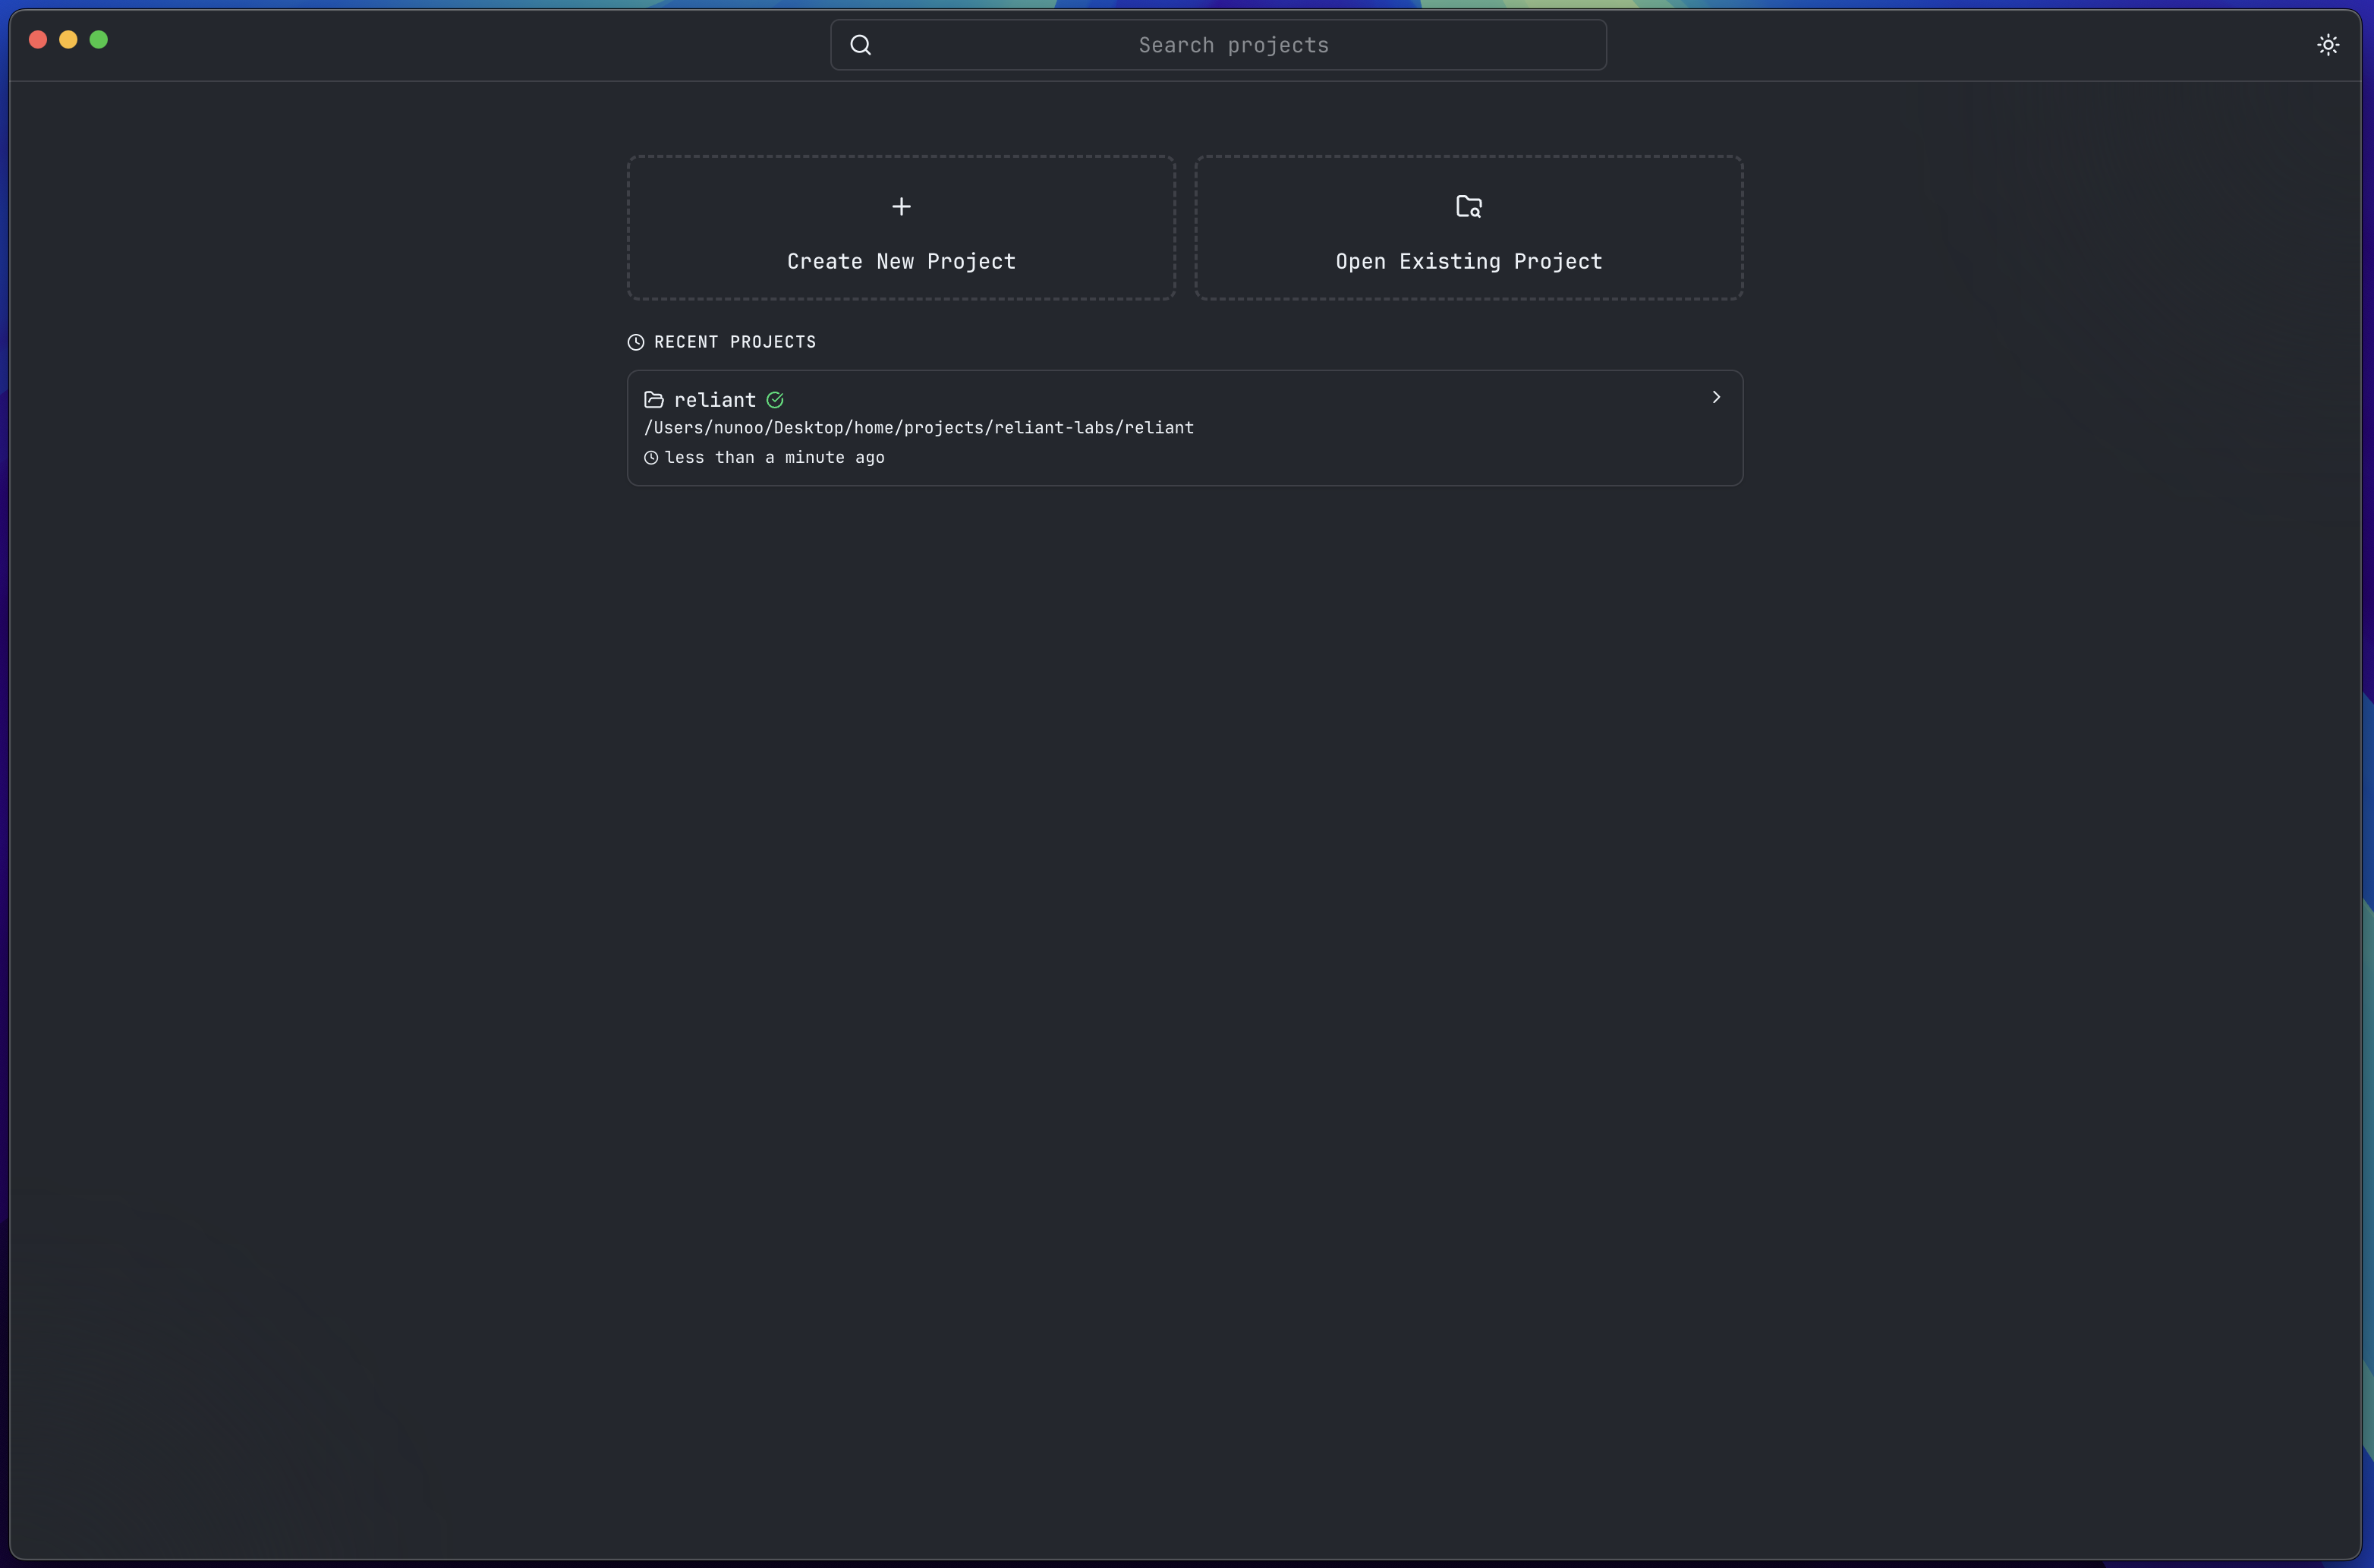
Option A: Open Existing Project
- Click “Open Existing Project” in the menu
- Navigate to your project folder
- Select the folder containing your code
- Reliant indexes your code (takes a few seconds)
Option B: Create New Project
- Click “Create New Project” if starting fresh
- Give your project a name
- Click “Select Folder” and choose where to create it
- Click “Create”
- Reliant sets up and indexes the project
Step 3: Start Your First Chat
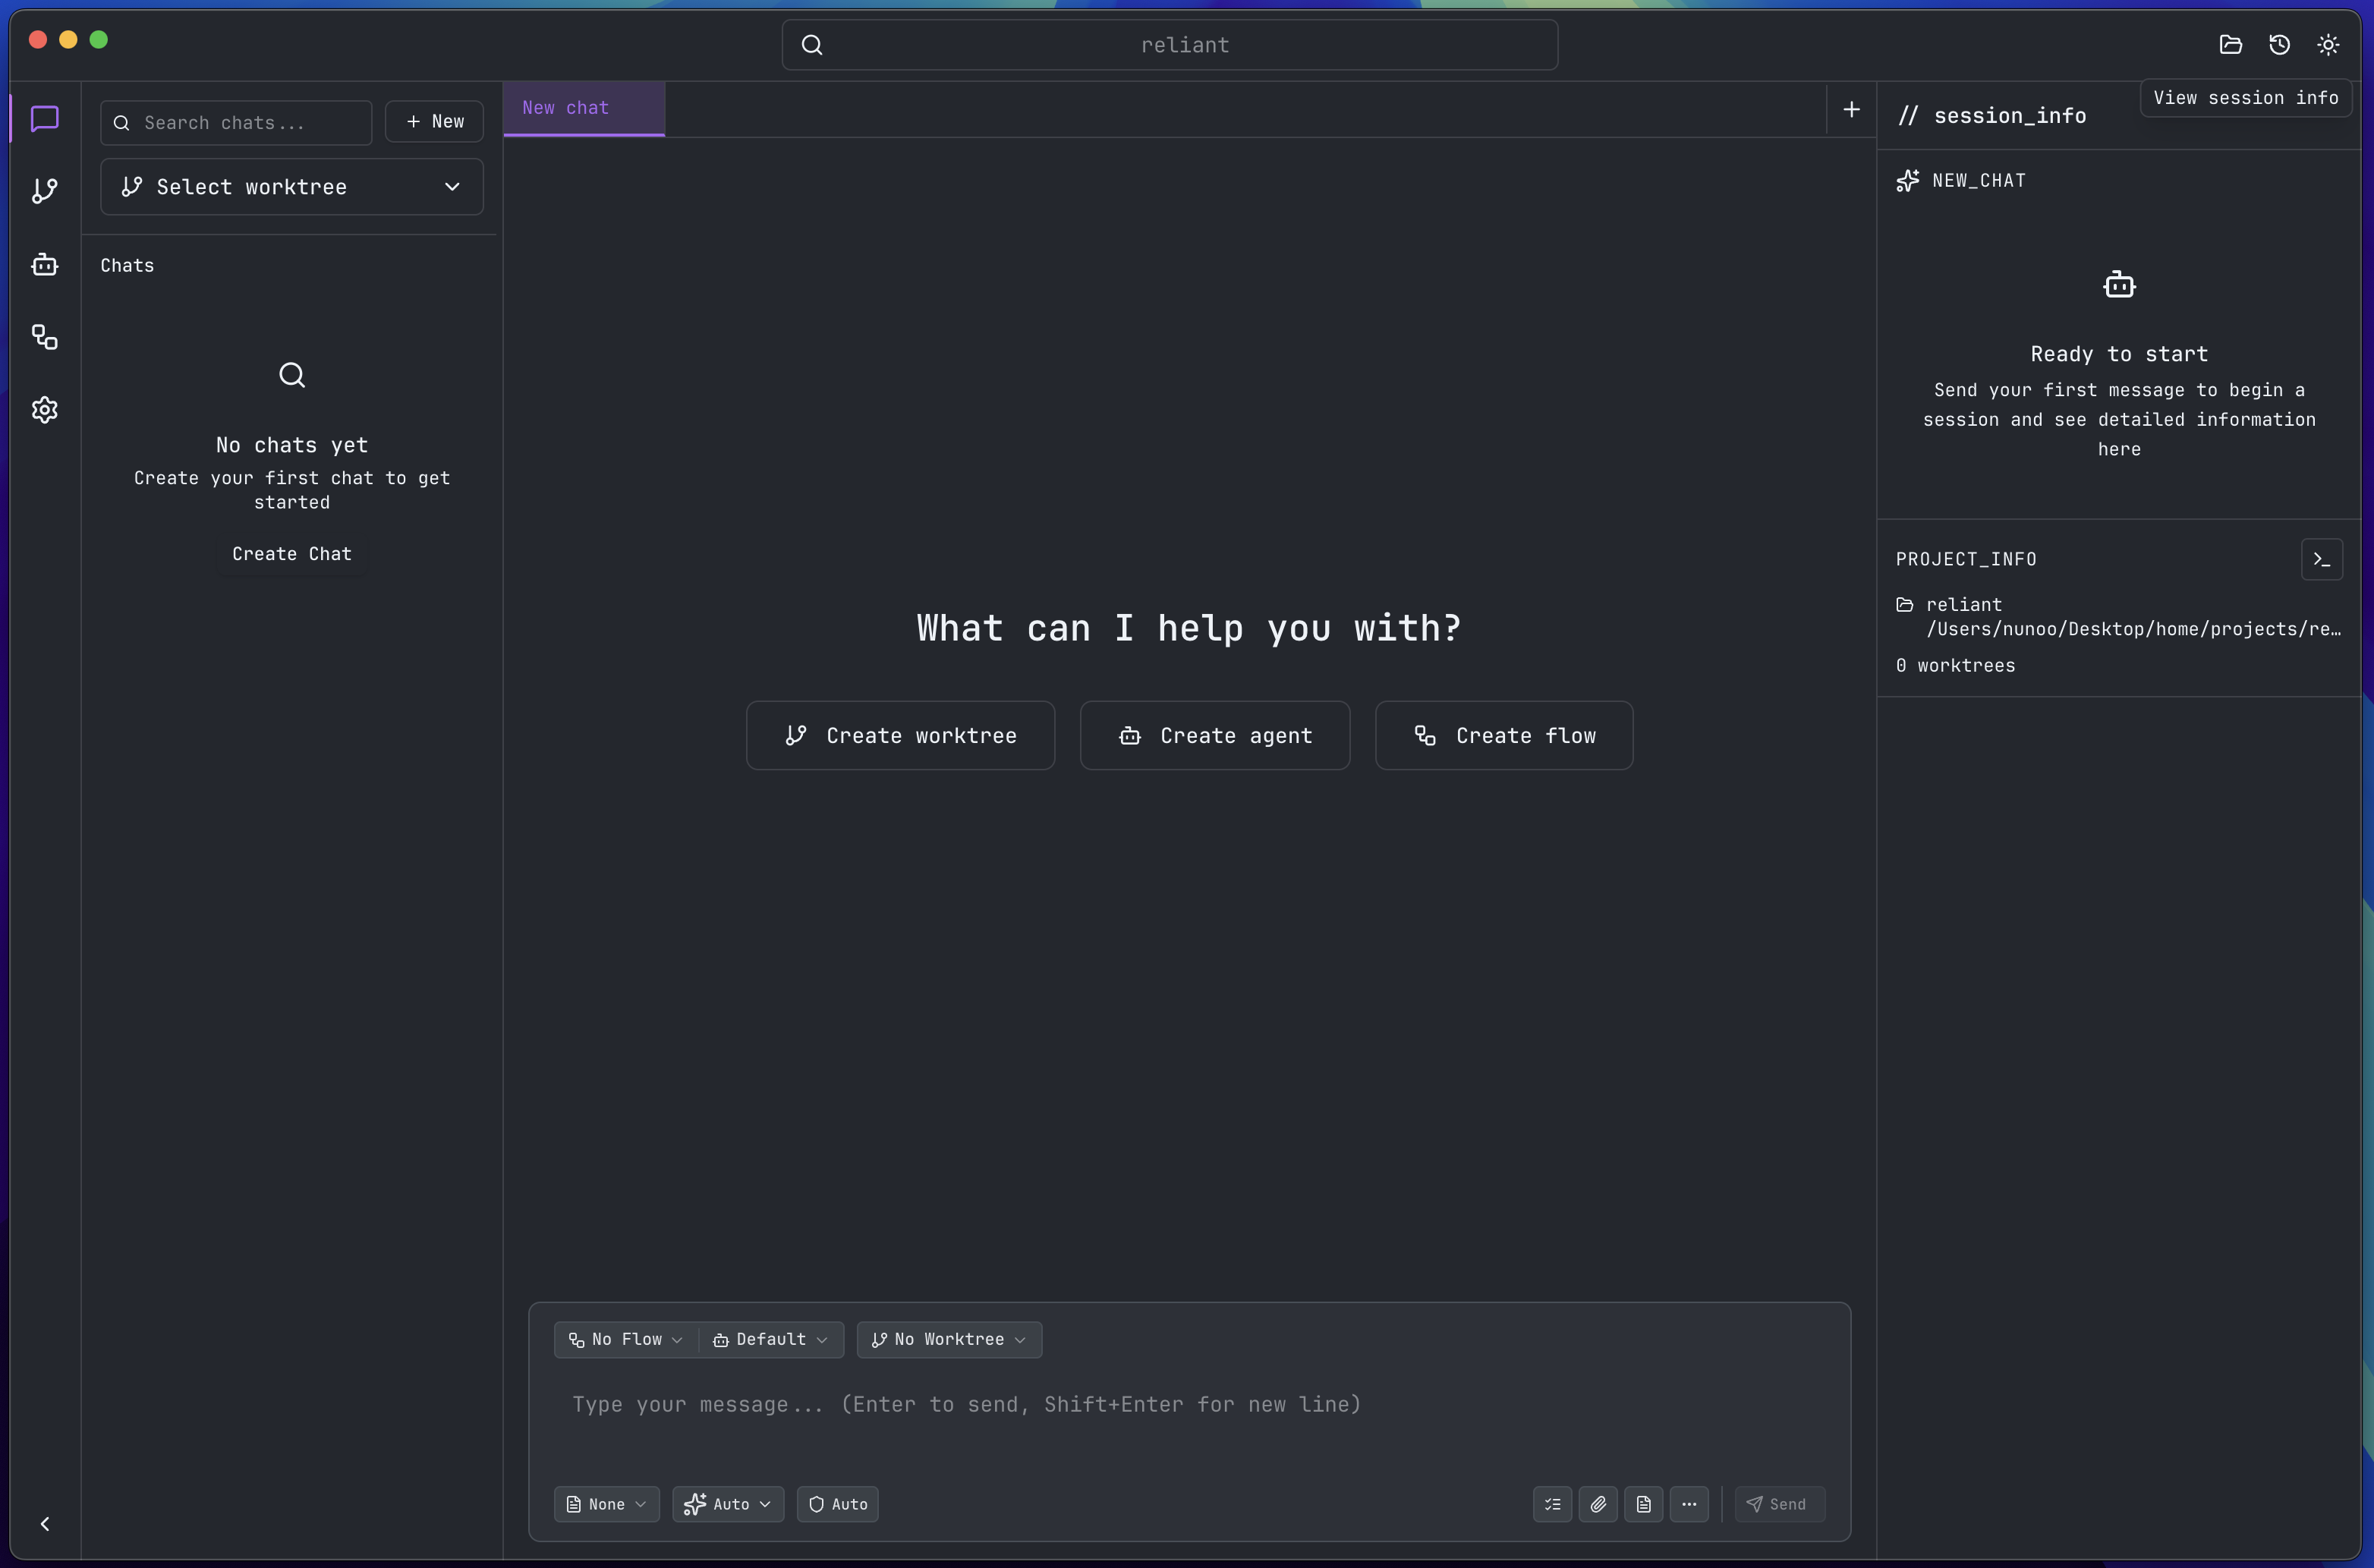
- With your project selected, click in the chat input
- Try one of these starter prompts:
- “Explain the structure of this project”
- “What does the main file do?”
- “How can I run this project?”
- Press
Enterto send - Watch as Reliant analyzes and responds
Understanding the Interface

Main Areas
Navigation Bar (Far Left)
- Chats: Your AI conversations
- Worktrees: Git branch management
- Agents: Specialized AI assistants
- Flows: Automated workflows
- Settings: Configuration
Sidebar (Context Panel)
- Shows content based on selected navigation item
- In Chats: List of all conversations
- Search and filter capabilities
- Quick actions
Chat Area (Center)
- Message input at bottom
- Conversation history above
What’s Next?
Explore Features
Customize Your Experience
- Settings - Configure preferences
Get Help
- Support - support@reliantlabs.com
Ready to code? Open a project and start chatting with Reliant. The more you use it, the more you’ll discover how it can accelerate your development workflow.